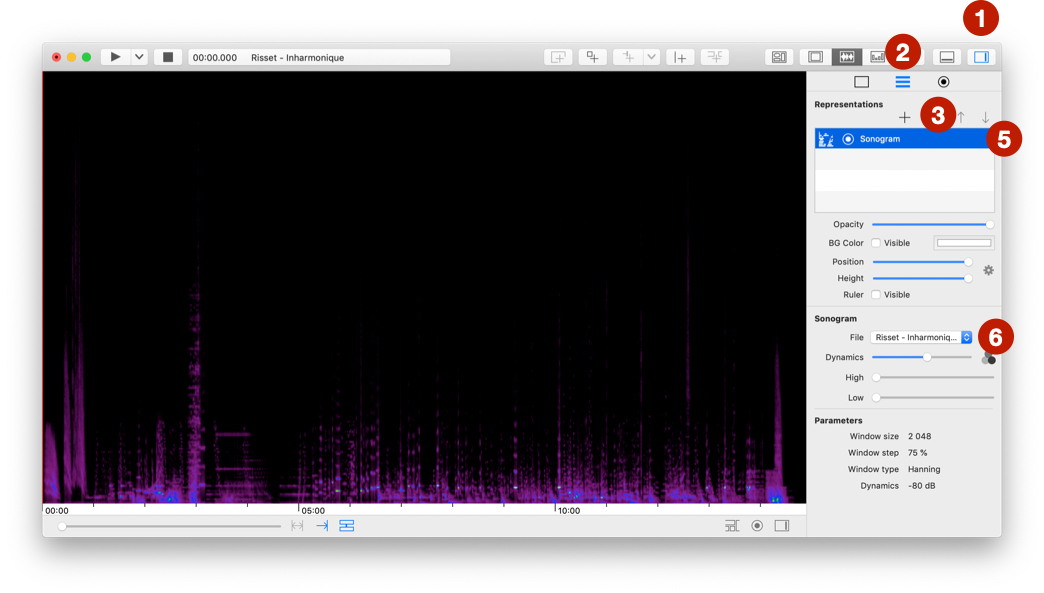
Temporal visualization: Main properties
To use the temporal view, you must import a media or a data file.
To move the playhead, use ALT + click.
Add a representation
To add a temporal representation:
- Open property panel.
- Select the second tab.
- Click on
+ button.
- Select a type of representation. This menu only shows representations that are compatible with imported files.
- Select the new representation.
- Change
File settings to the right imported file.
The properties displayed under the File parameter depend on the type of representation.
Edit main properties
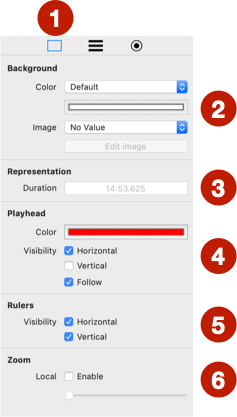
- Select first tab of property panel.
- Change background: color or image.
- Change duration of representation: only available when there ar no representation.
- Change playhead properties.
- Show/Hide horizontal (time) or vertical rulers.
- Activate the local zoom. You can have a local zoom on the timeline and another on this view. By default, they are linked.
Edit representation properties
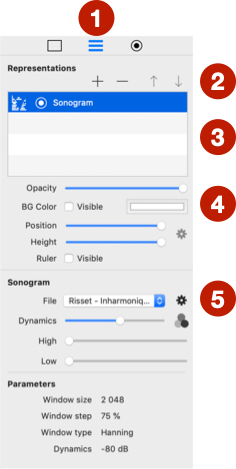
- Select second tab of property panel.
- Commands to add, remove a representation and to change order (top is in back and bottom is in front).
- List of representations: change visibility and edit the title.
- Main properties of representation: opacity, background color, position and height, and vertical ruler visibility.
- Property of representation.
Ruler is not activated for all representation, only some of them have vertical ruler.
View properties

- Select third tab of property panel.
- Show/Hide annotations.
- Change properties of annotation layers.
- Show/Hide markers and change their properties.
Display information
Select View > Show Information to display information floating frame at the top right of temporal representation.